Hello everyone! It surely has been a while. I’ve been a little busy workin on puzzles and binge watching TV shows, I am sorry. I hope you all are doing the best you can to socially distance yourself from others in order to prevent the spread of COVID-19 and that you, your family, and your friends are staying healthy during this odd time. Since most of us are trying our best to stay inside and not make unnecessary trips to the store, you may be finding yourself running low on baking essentials, but have no fear! I have created the perfect baking substitutions video for you. It’s a little long, I know, but that’s because not only does it give you the straight facts, it also gives you the science as to why certain subs work. My hope is that after watching it, you will have the tools to be able decipher baking substitutions on your own without looking them up! You can do this! I also have a chart below for your viewing pleasure. Stay safe and healthy, friends!
^^^LOL LOOK AT THAT THUMBNAIL! Do you believe that was the BEST option?!^^^
Function
Traditional Ingredient
Subs
Structure
Wheat flour (1 cup)
– 1 cup whole wheat flour – 1 cup nut flour (almond, pistachio, etc) – 1 cup coconut flour – 1 cup buckwheat flour -Misc. Ideas (Convert at your own risk!): Canned pumpkin Mashed chickpeas Mashed black beans Sweet potatoes
– 1 cup salted butter (just used less salt in recipe) – Less than 1 cup of oil (remember: olive oil may affect flavor) – 1 cup mashed avocado – 1 cup vegetable shortening – 1 cup coconut oil
Sweeten
Granulated sugar (1 cup)
– 1 cup brown sugar – 1 1/4 cup powdered sugar -3/4 cup honey, maple syrup, or molasses
Leaven
Baking powder Baking soda
– 1 tsp baking powder = 1/2 tsp cream of tartar + 1/4 tsp baking soda – Sub baking powder for baking soda at your own risk
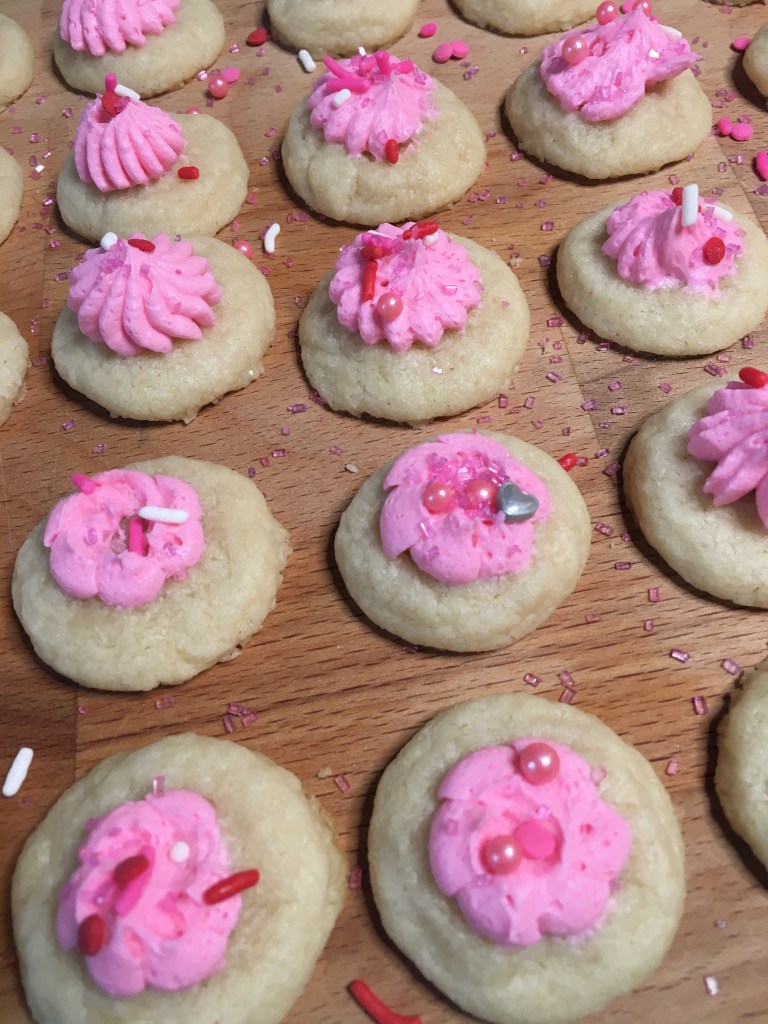
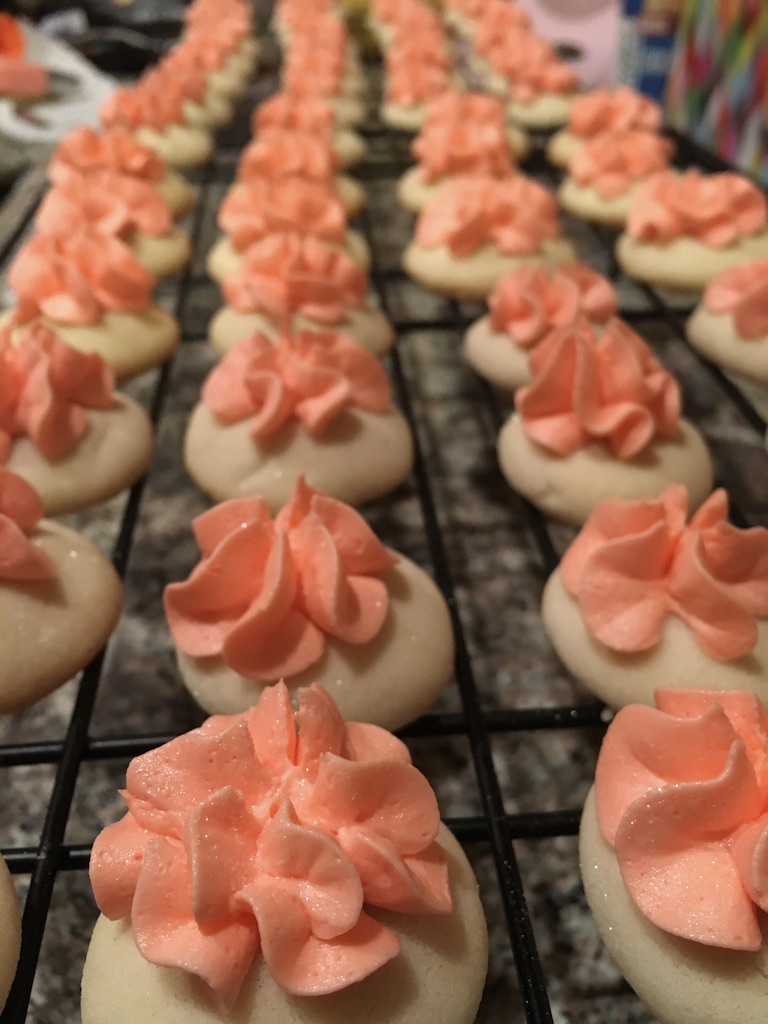
Hello Everyone and Happy Valentine’s Day! I have a very special video for ya’ll today. It is my treat to you! Why is it so special you ask? Well because it is how to make my most FAVORITE COOKIE EVER! These babes are buttery, sweet shortbread cookies and they will change your life. The smaller you make them the better, because you can just pop them in your mouth and eat 1000 before you can even say, “How many have I eaten?”. It’s insane. Recipe below, ENJOY!
BTW! In my video, you will notice I use granulated sugar for the cookie. I usually use powdered, but I only had enough powdered sugar to make the frosting so I had to improvise. They still turned out good, all was well.
Shortbread Cookies (aka Butter Cookies) Yield: ~60 mini cookies (Trust me… you’ll eat them all) Ingredients for Cookies: 2 sticks (1 cup) unsalted butter, at room temp. 1 cup powdered sugar (OR 3/4 cup granulated sugar if you don’t have enough powdered sugar) 1 teaspoon vanilla extract 2 cups all-purpose flour 1/4 teaspoon salt 1 tablespoon milk (almond, soy, reg, cream…whatever you want!)
Ingredients for frosting: 1 1/2 cups powdered sugar 1 stick (1/2 cup) unsalted butter, at room temp. 1/4 teaspoon almond extract 1/4 teaspoon vanilla extract 1/2 to 1 tablespoon of almond milk (or soy, or reg. milk, or cream! dealers choice) 1-2 drops of gel food coloring.
Directions for Cookies: 1. Preheat oven to 350 degrees Fahrenheit. 2. Cream butter and sugar, then add vanilla extract. Whip until fluffy and smooth. Do not overwhip in this step or your cookies will come out dense! 3. Sift flour and salt together, then add to your butter/sugar mixture. Blend together until ingredients are combined, but slightly crumbly. 4.Add milk and blend a little longer until dough is smooth and slightly clumpy. 5. Roll into 1 inch balls and flatten into disks. Place onto a baking tray lined with parchment paper. Cookies will spread slightly when baking. 6. Bake for 10-12 minutes until bottoms are lightly golden brown. 7. Cool on a baking sheet and then frost!
Directions for frosting: 1. Mix butter and sugar on low speed until crumbly, then beat on medium speed for about 3 minutes until smooth. 2. Add extracts and milk and beat at medium speed for 1 minute. Add more milk as needed. If you add too much milk, add a little more sugar. Practice makes perfect. 3. Blend in food coloring and you’re done!
Hello Everyone! Below you will find a mediocre video on how to make macarons (lol). It was my first time recording my baking process which was actually a lot harder than I expected. I learned a lot about camera angles and will improve on that for future videos, but I feel like this video gets the point across. Macarons can be a little tricky to make and I would say it took me about 20-30 trial and errors to get my technique down, so don’t feel discouraged if your first couple of tries don’t come out perfect. Speaking of, I actually changed my recipe since making the video so you will find that the one I have posted below is a little different than the one in the video. Both work, but the new one allows for a more consistent, full shell in my opinion. Enjoy and message me with questions!
Photo credit: Alayna Parker Photography Macaron Credit: Me
French Macaron Recipe (Yield ~30 macarons) Ingredients for Macaron Shell: 1 1/4 cup almond flour (spooned into cup) 1 1/2 cup powdered sugar (spooned into cup) 3 egg whites, aged and at room temperature 1/2 teaspoon cream of tartar 1 pinch salt 1/4 cup granulated sugar 1/4 teaspoon almond extract 1/4 teaspoon vanilla extract
Ingredients for my favorite Vanilla Buttercream: 3/4 cup unsalted butter (1.5 sticks), softened 3 cups powdered sugar (packed into cup) 1/4 cup soy or almond milk 1 teaspoon vanilla extract or vanilla bean paste to taste 1 teaspoon almond extract salt (to taste)
Directions for Macarons: 1. Age your egg whites! 24-48 hours before you plan to make your macs, separate 3 large egg whites from yolks and place in a bowl covered with plastic wrap. I place this in the fridge to age, you can apparently also just leave it out on your counter, but that scares me. Bring to room temperature on the day you plan to make your macarons. If you don’t have time to age your egg whites, just make sure they are at room temperature before using. 2. Organize your supplies! Place parchment paper onto baking sheets and draw 1 inch round circles with pencil onto the bottoms on the parchment paper (If needed. You don’t have to draw the circles if you don’t want to). Prepare a piping bag with a large, round piping tip. Set all ingredients and measuring tools aside. (MISE EN PLACE!!!) 3. Measure powdered sugar and almond flour by spooning into measuring cups. Place into a food processor and blend until smooth, about 30 seconds. 4. Pour powdered sugar and almond mixture into a sifter and sift one time. Set aside. 5. Meringue timee! Place your aged egg whites, cream of tartar, and salt into the bowl of a stand mixer fitted with the whisk attachment. Blend at speed 2-4 until frothy and bubbly, then add your granulated sugar slowly. 6. Increase speed to 6 and whip until soft peaks form, then add vanilla extract, almond extract, and food coloring. Continue whipping and check meringue often until you just hit stiff peaks, then stop and remove from stand mixer. 7. Time for Macaronage! Pour half of your almond flour/powdered sugar mixture into the meringues and gently fold in using a rubber spatula until combined. Add the rest of the flour/powdered sugar and fold until. Once incorporated, continue to fold batter by swiping the edges of the bowl with the rubber spatula and then parting down the middle of the batter. You can also rub the batter onto the edges of the bowl. This releases some of the air bubbles. Check the consistency of your batter often by scooping up the batter with the rubber spatula and letting it fall down into a figure-eight pattern. If the batter falls in a smooth, consistent line, it is ready. If it falls in chunks, keep mixing. The batter should fall slowly like lava and should have a slightly grainy texture. If the batter falls quickly, or looks completely smooth, you have stirred too much and your batter is too thin. If you mess up, its okay! Bake the cookies anyways and that will help you troubleshoot batters in the future. 8. Place batter into piping bag and pipe 1-inch diameter round circles in even lines. 9. Tap the tray on the counter to release air bubbles! Use a toothpick to pop any remaining bubbles. 10. Let sit at room temperature for 30 minutes-2 hours to dry. To speed up this process, place next to a dehumidifier. Your cookies are ready to bake when you can rub your finger across the top without pulling the batter. They will be dull looking and dry. 11. BAKE! at 300 degrees Fahrenheit for 12-14 minutes. Your cookies are done when they are hard and remove easily from the sheet. Touch them slightly, if they wiggle at all or stick to the sheet keep baking! 12. Let cool, remove from baking sheet, match with a similar sized shell and fill! 13. Place in an airtight container in the refrigerator for 24 hours before enjoying! (SERIOUSLY DO THIS! Your cookie will absorb the moisture of the filling and become melt in your mouth delicious) **Notes** -Macarons are good for up to 1 week in the refrigerator and up to 6 months in the freezer. They freeze incredibly well and thaw out beautifully -Let them sit at room temperature before eating! You can eat them cold but they are not as good. -Use a small amount of the batter as glue to hold your parchment paper onto your baking sheet. -If adding sprinkles, do so immediately after popping air bubbles. If you wait, they will not stick. -Get creative with flavors!! You can use any flavored extract you want. If adding powdered flavors (like cocoa or matcha powder), add these to the food processor with your dry ingredients. If you add a lot of extra powder, remove an equivalent amount of flour or powdered sugar.
Directions for Buttercream: 1. Beat softened butter in a mixer until smooth. 2. Add powdered sugar and beat for about 1 minute. 3. Add milk, vanilla extract, almond extract and salt. 4. Beat until smooth and serve! **Notes** -If adding food coloring, use gel food color and add at the end. -I use the paddle attachment of my mixer when whipping this frosting, it helps to beat out air bubbles. -You could really use any milk or cream for this recipe. I like using almond or soy because it gives the frosting a lighter flavor.
Left to Right: Me, Bebe, Cookies. In case you weren’t sure.
Hello! and Welcome to the Dreamy Life! I figured I would write a little intro post to get us started on this journey I have decided to take us on. For those of you who don’t know me, my name is Sharon and I live in Columbus, Ohio with my boyfriend and our adorable, sweet little babe of a dog named Bebe. I went to college for 8 years to pursue a doctorate degree in pharmacy and while I was finishing my seventh year of that program I fell head over heals for baking. Now, don’t get me wrong, I have always loved to bake, but something clicked in me while I was in school that opened up this creative side of me that I had never seen before and it inspired me. It inspired me to take chances and try recipes that I before would have never dared to try, and they turned out delicious and I had a lot of fun doing it. Since then, I have been chasing this feeling of passion towards baking and trying to figure out what to do with it. How can I take this hobby and turn it into something more? You see this isn’t something I like to do here and there on a rainy day, it’s something I think about all the time and it’s something I want to share with others. That’s where you all come in. I decided to create this website to use as a hub for all of my creative ventures in baking. It’s not going to be a run of the mill food blog where I write long stories about why I decided to make french toast (though honestly, look at where we are in this post already…). I promise, I’m really going to try to make other posts shorter. What I want for my posts are for them to be short, sweet and to the point. Some will provide you with helpful tips, tricks and baking basics, where others will be photos of cool bakes that are intended to inspire. I’ll be including YouTube videos within these posts, but if blogging isn’t your thing, by all means just check out the IG and YouTube channels on their own. I’m going to try my best to link all of my social media together so you can make what you want of it. So anyways, that’s about it. If you want to see certain content or have suggestions, please shoot me an email or DM me on instagram. Otherwise, sit back and enjoy. Thanks for your support!